Register StealthMail application
Click on the Watch video button to see the whole process described below.
To deploy StealthMail within your Azure subscription, you need to register the StealthMail application in Azure Active Directory (AD).
This allows StealthMail service to get authorized access to Azure services, including Azure Active Directory, and provide secure email correspondence to the contacts.
To register StealthMail application in Azure AD, please follow the next steps:
- Sign in to Azure portal using an account that has administrative rights within the Azure subscription, where you are going to deploy StealthMail.
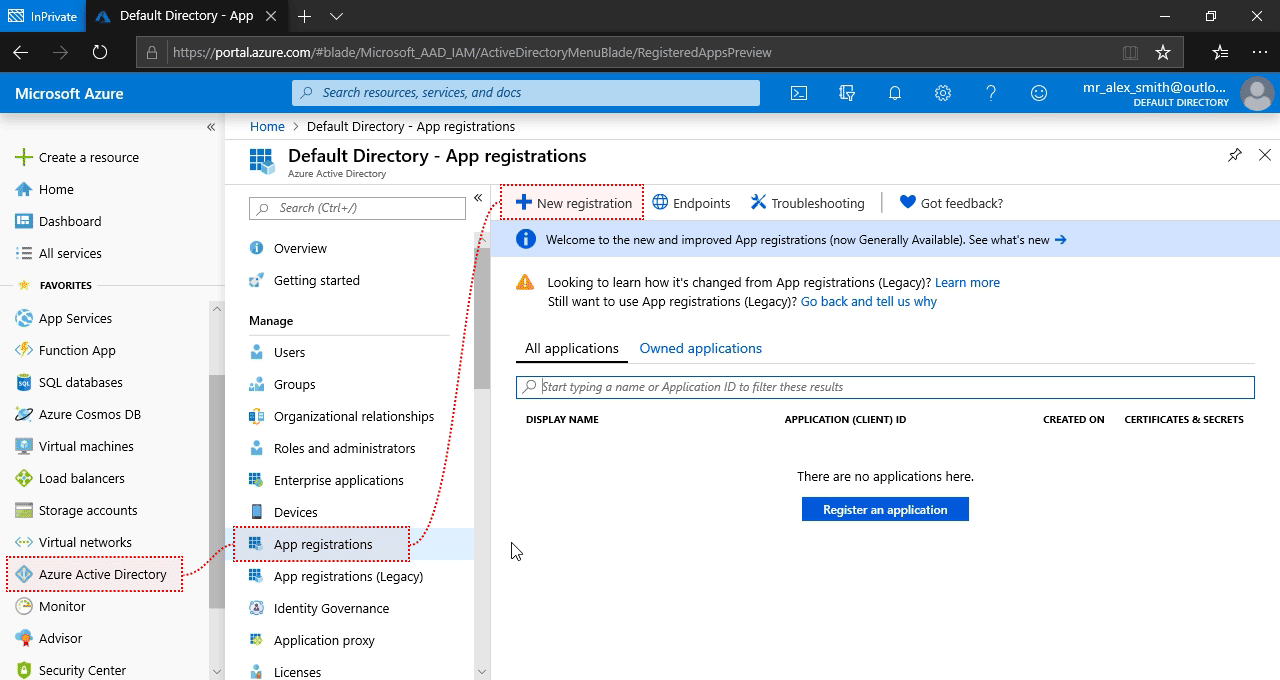
- Navigate to Azure Active Directory and then to App registrations.
- Click on the New registration button.
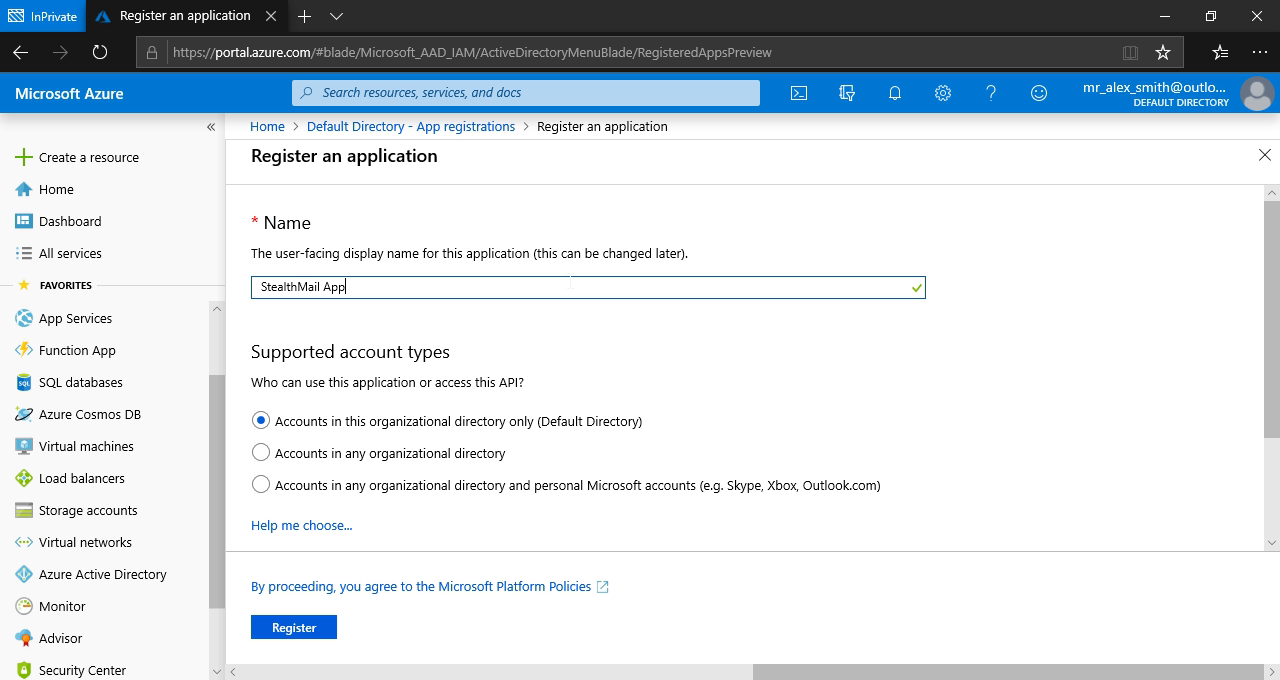
In the new pane, specify the name of the application (e.g. StealthMail App).
Leave the rest of the options with their default values and click on the Register button.
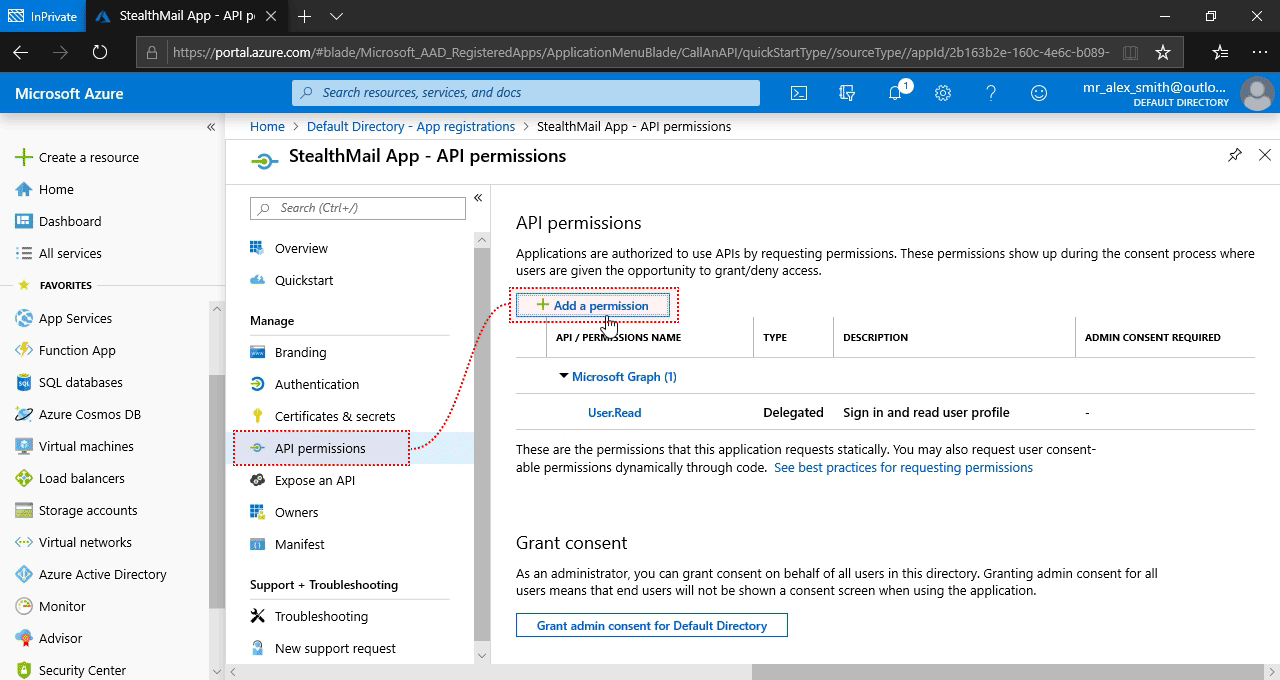
Next you need to grant certain permissions to the application. That will allow StealthMail to interact with the necessary Azure components and services.
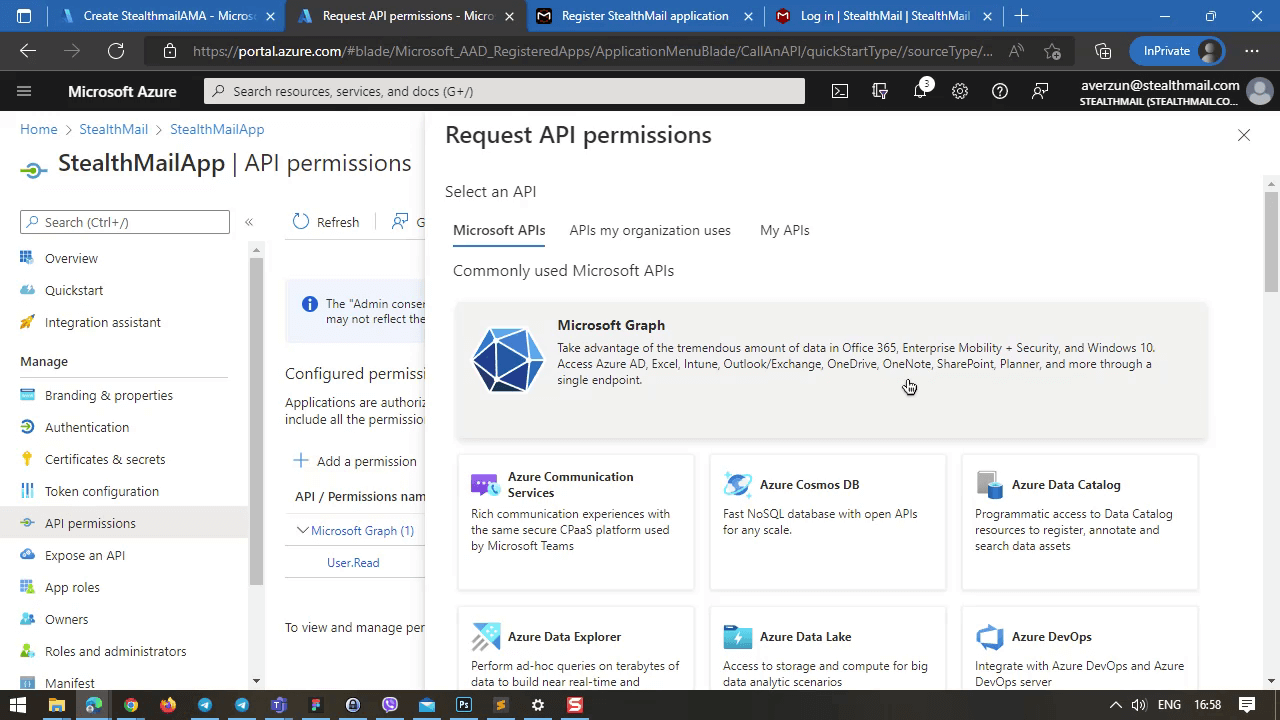
Click on the API permission list item, then click on the Add a permission button in the new pane.
In the new pane scroll down to the bottom of the page and choose Microsoft Graph.
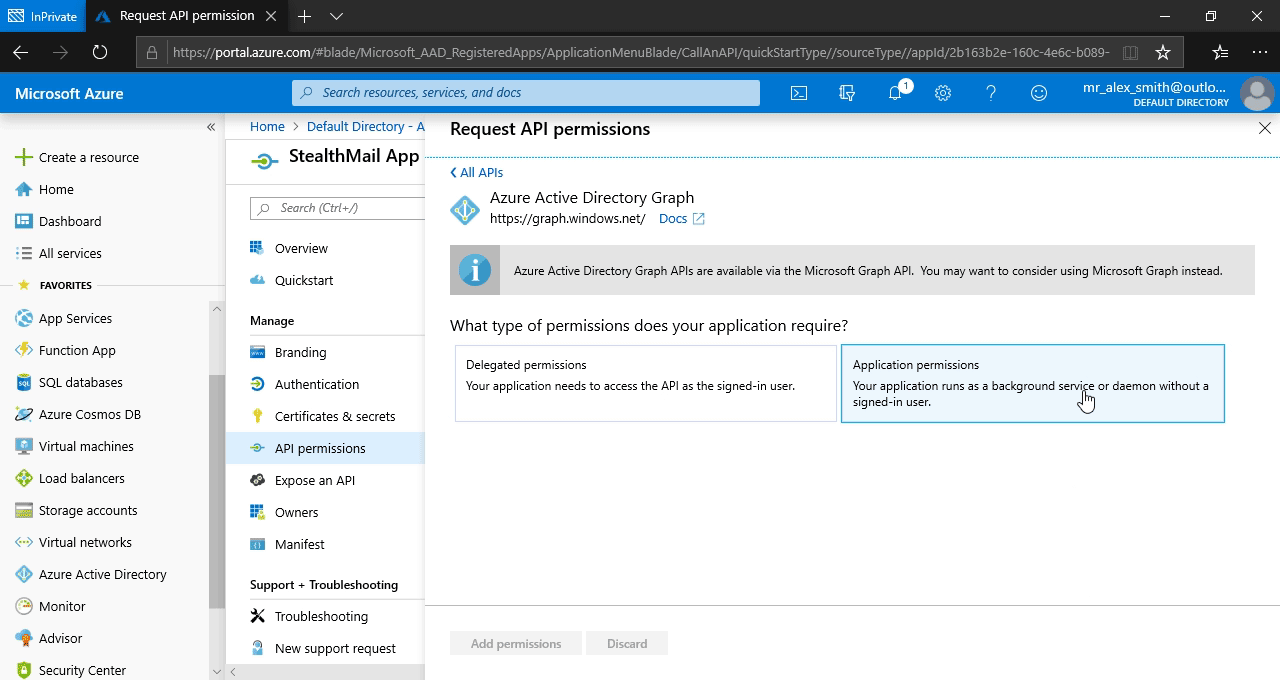
Choose Application permissions option.
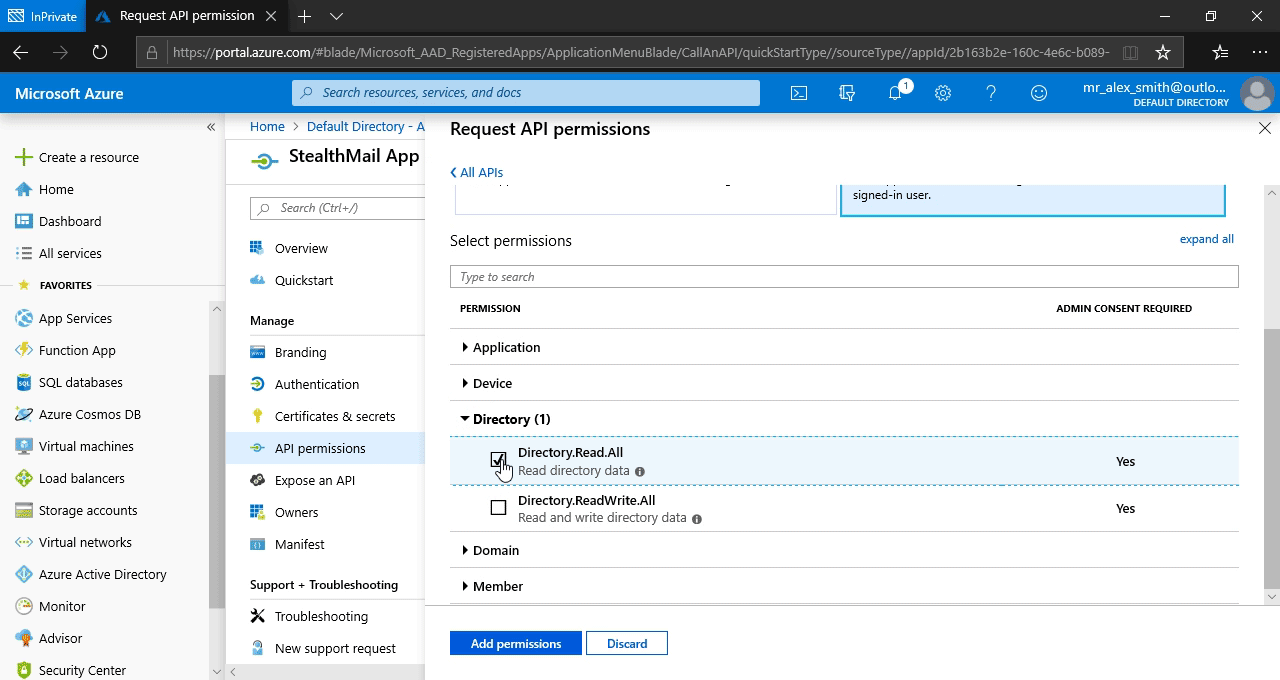
Scroll down the new pane.
Expand the Directory section and choose Directory.Read.All.
Then click on the Add permissions button.
Then you will be notified that “Permissions have changed [...]”.
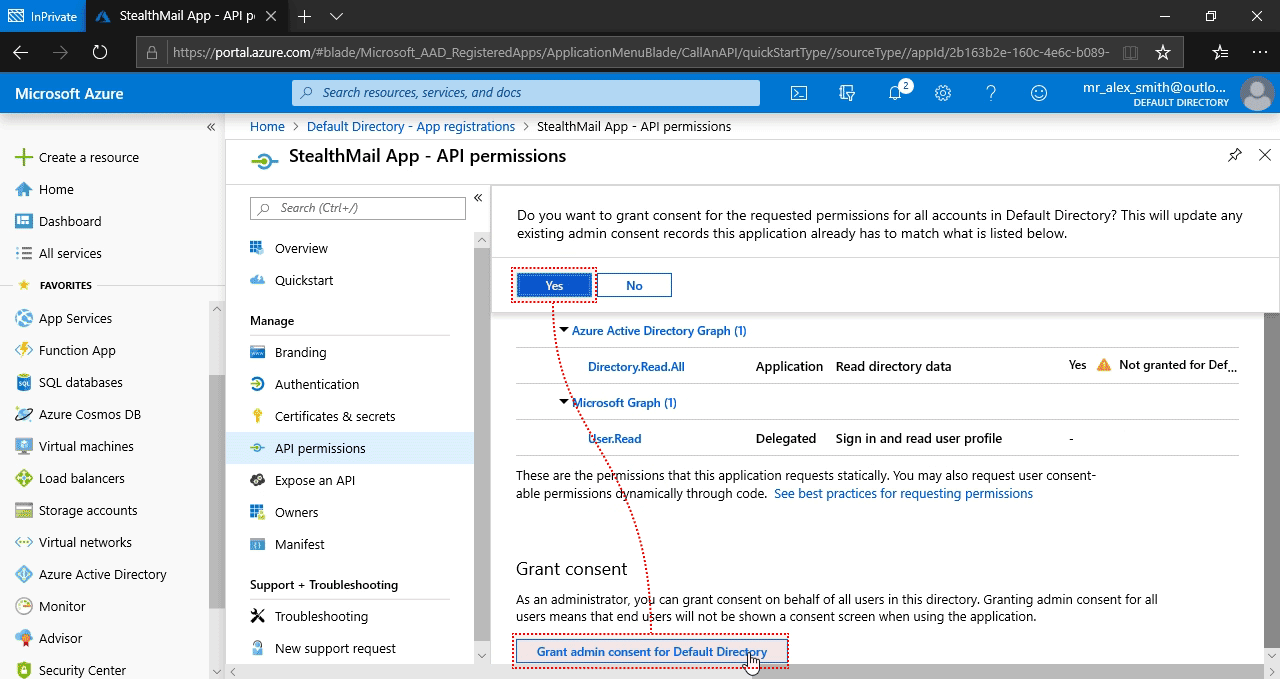
To complete this step you or Azure subscription administrator (who has the necessary rights) should grant consent.
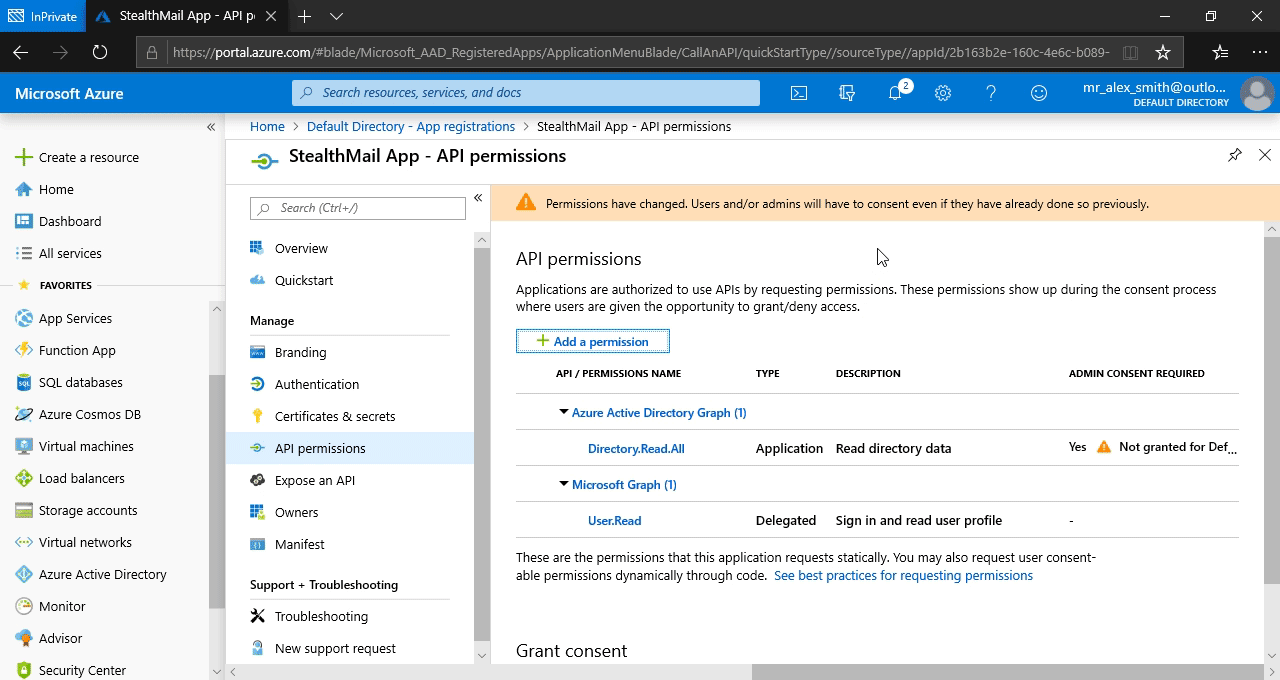
Scroll the page down and click Grant admin consent for Default Directory button and confirm your action by clicking on the Yes button.
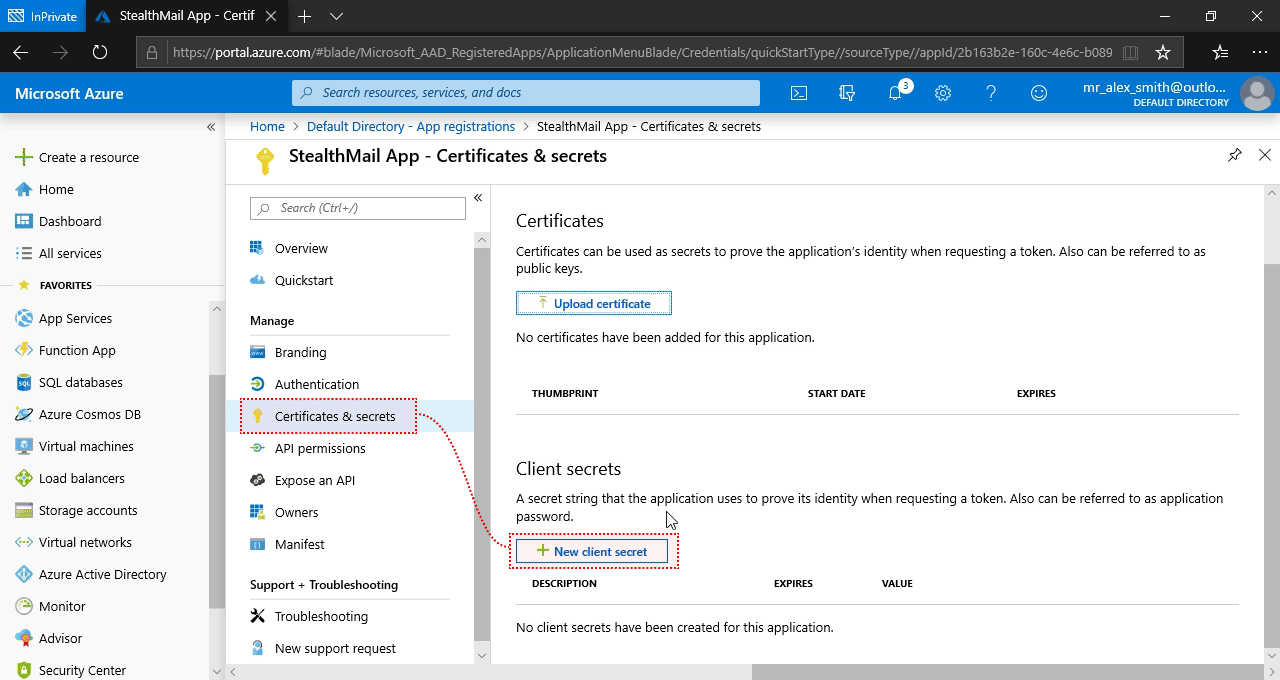
After permissions, go to the Certificates & secrets section, then press New client secret to generate an Application secret. It is a password analogue for a recently registered StealthMail App. It is required for authorised API usage.
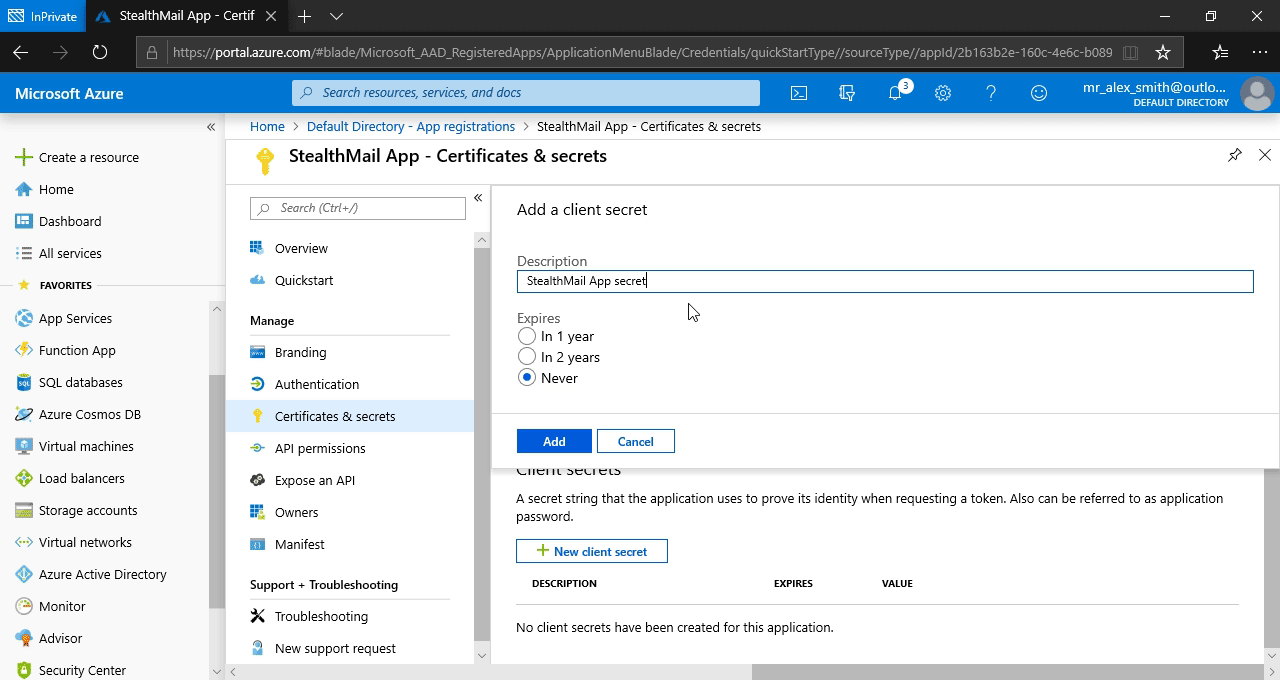
In the new pane enter any description you want and choose an expiration period Never.
Then click on the Add button.
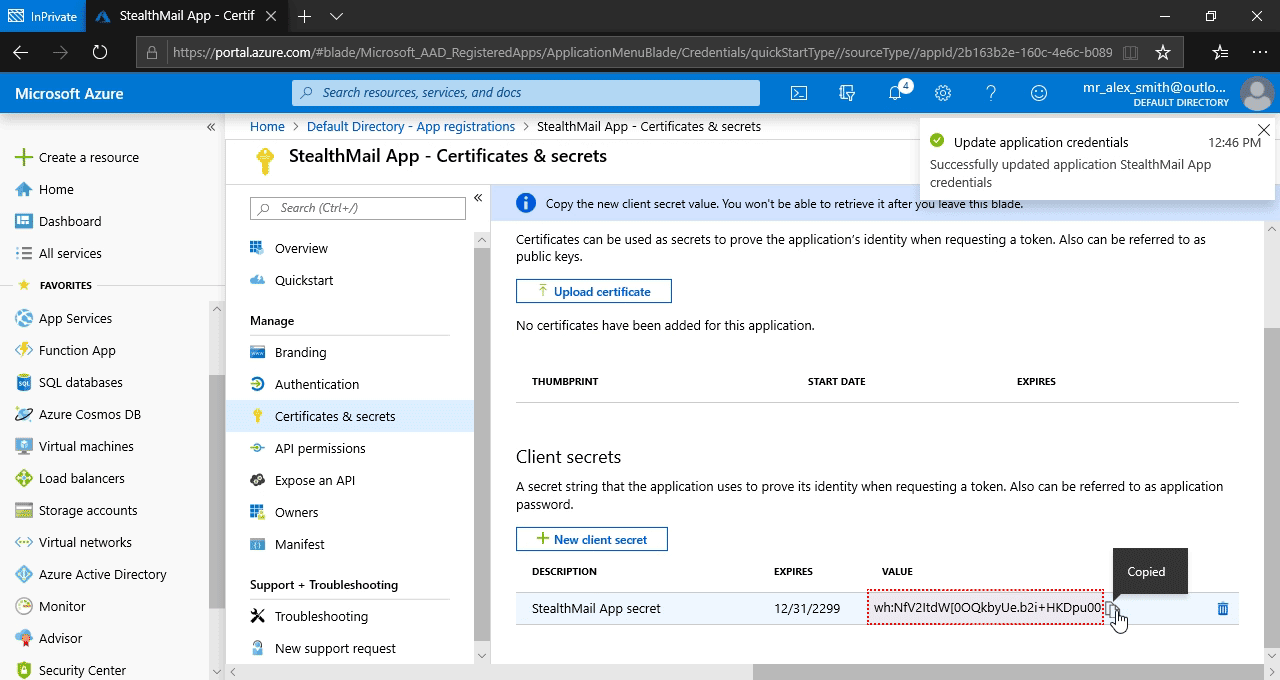
Scroll the page down and Copy the generated secret.
Please Note: Application secret has to be saved to the protected storage right away, because after refreshing or leaving the current page the content will be hidden and will not be previewed anymore.
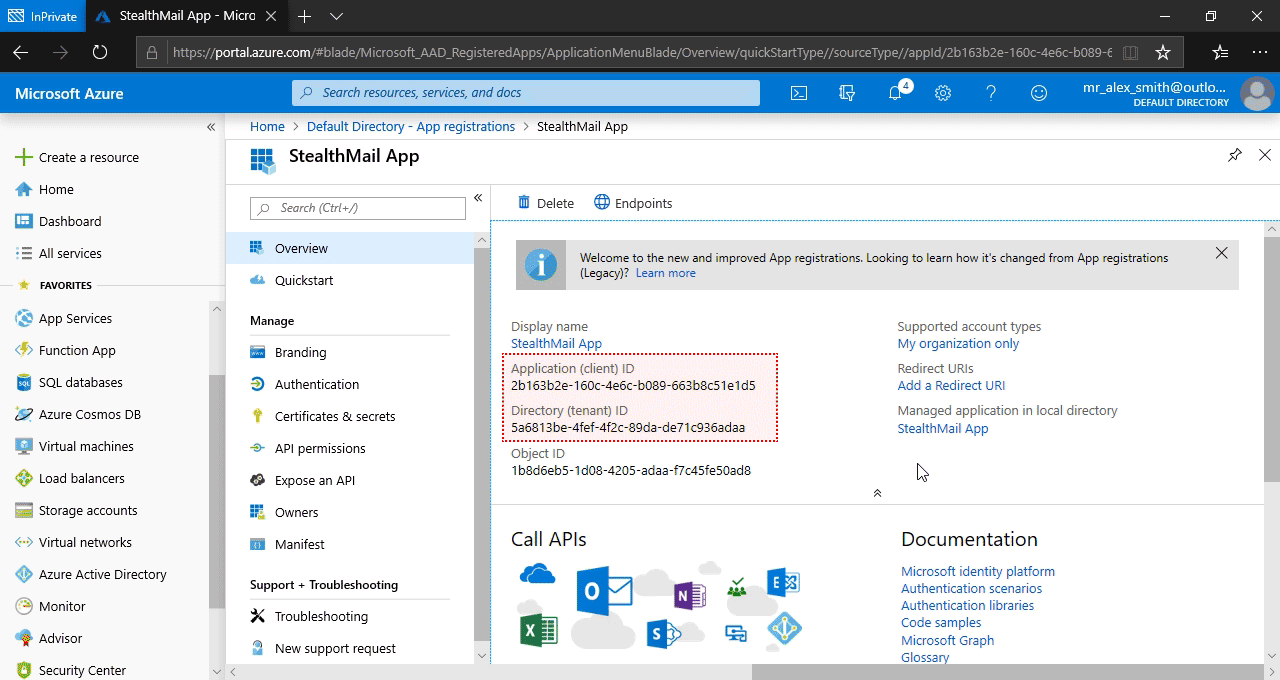
To complete the deployment of StealthMail service you will need to save the next values from the Overview page: Application (client) ID, Directory (tenant) ID and Secret you have saved previously.
Please follow the main guide to finish the deployment of StealthMail.