Add users to Azure Active Directory
Click on the Watch video button to see the whole process described below.
Using Active Directory (or Azure Active Directory, a user management service based on LDAP) is essential for StealthMail service. Without it, StealthMail can’t get data about users from your company and can’t provide them with secure email correspondence.
If you are using Active Directory (not Azure Active Directory), please refer to following Microsoft guide. It will show how to configure sync between Active Directory and Azure Active Directory.
If you have a user management service based on LDAP, please contact us to discuss the available options for custom StealthMail configuration.
Azure Active Directory Case
All internal users that will use StealthMail should be added to Azure Active Directory.
Please note: users should have existing email addresses with your company’s domain name or aliases (e.g. username@companydomain.com). All other users can be invited via StealthMail clients.
If you haven’t added users to the Azure Active Directory, please do the following:
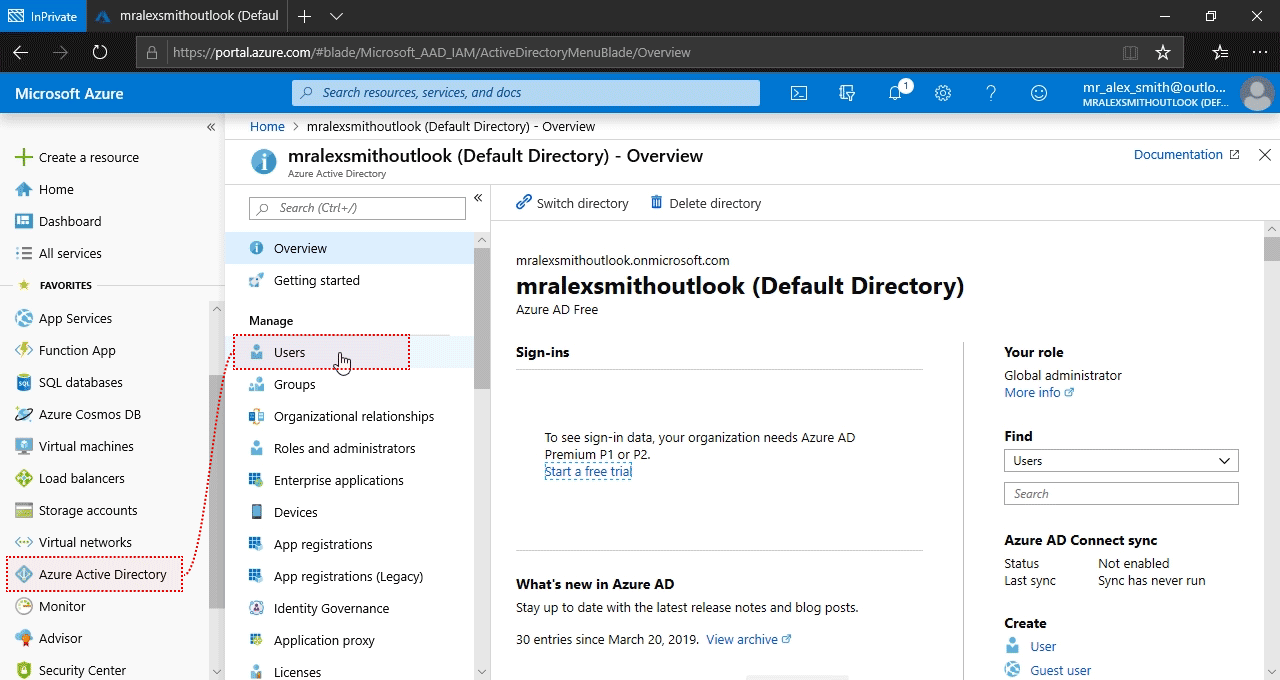
Log in to Azure portal.
Click on Azure Active Directory list item then Users.
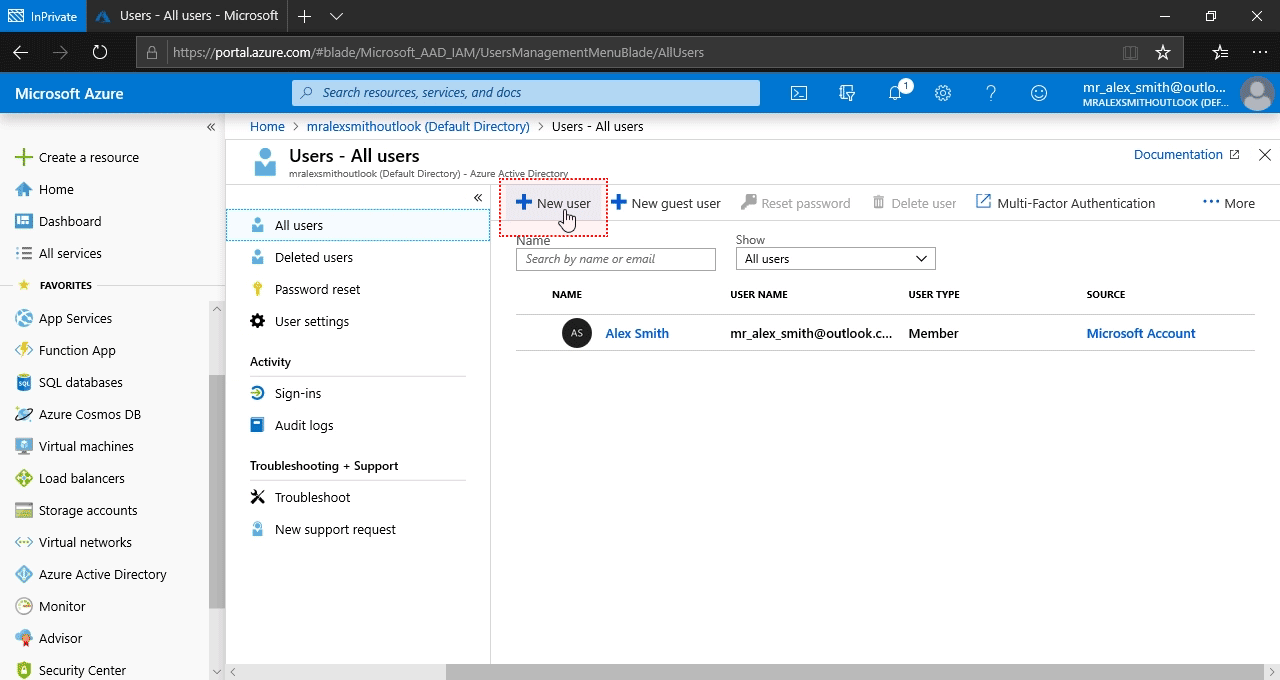
In the new pane click on the New user button.
Add full name to the field Name, and email address to the field User name, then click on the Create button.
Please note: you can add users who have emails with the verified domain
(e.g. username@companyname.com).

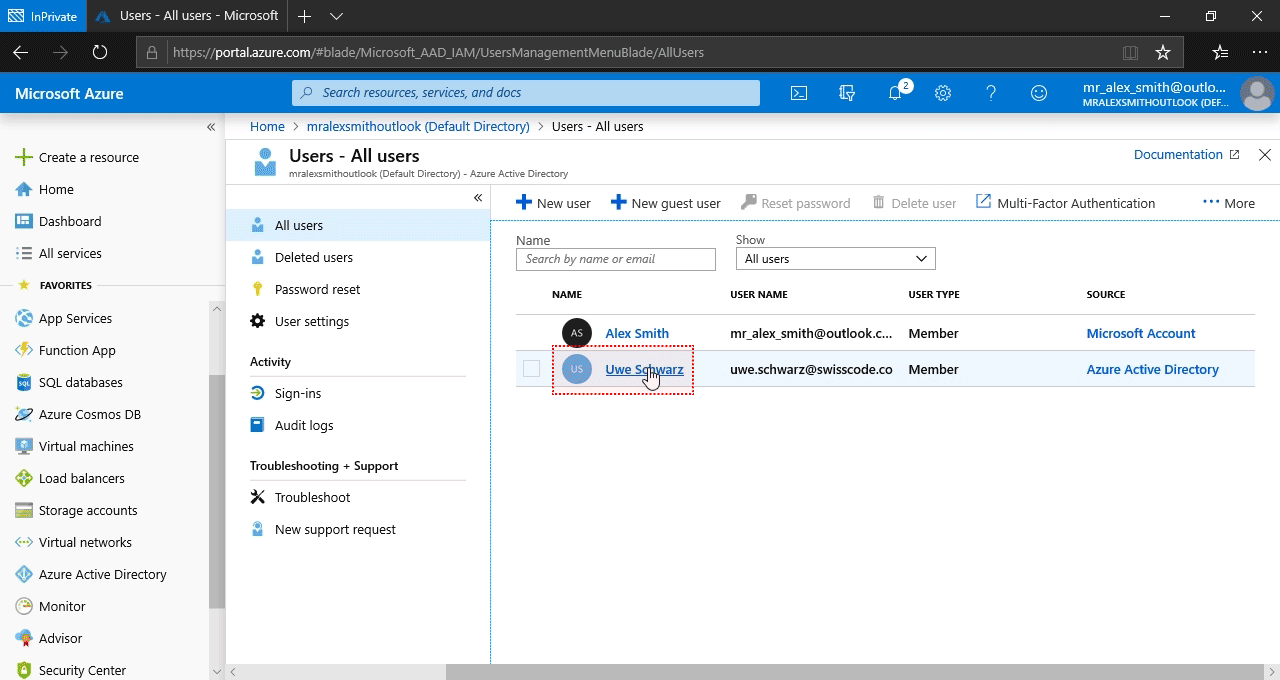
After you are redirected to the list of users, click on the created user.
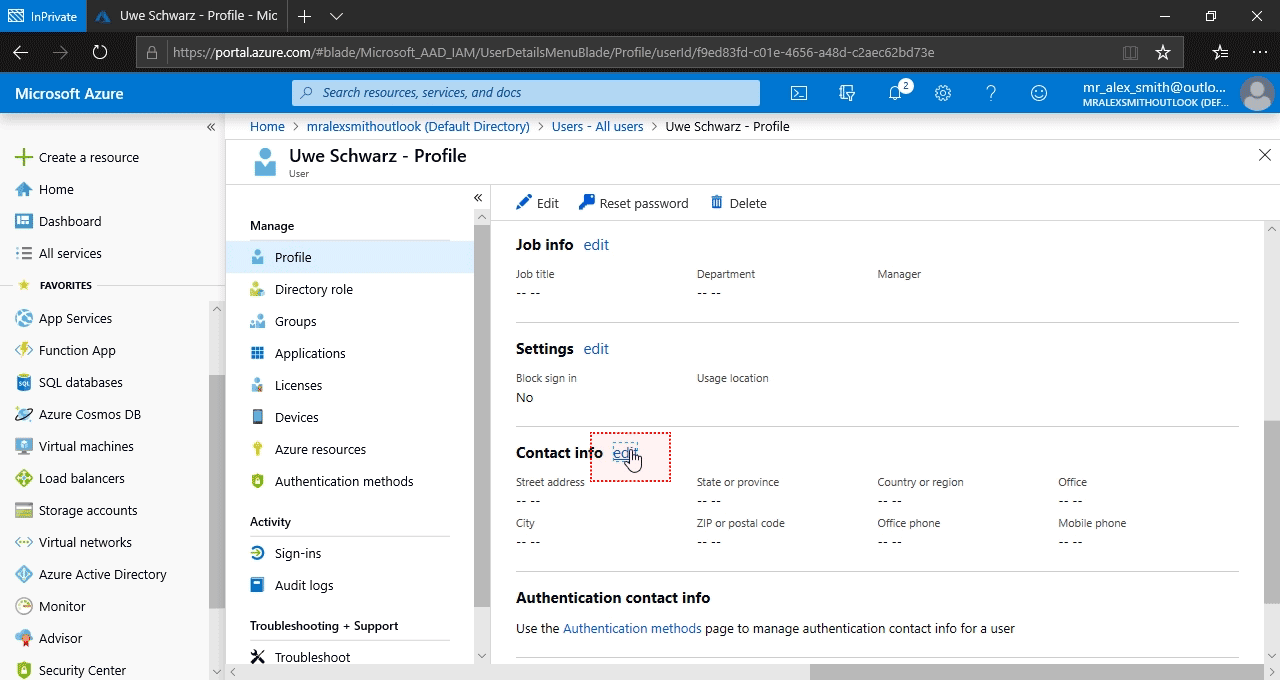
Scroll down to the Contact Info section, then click on the edit button.
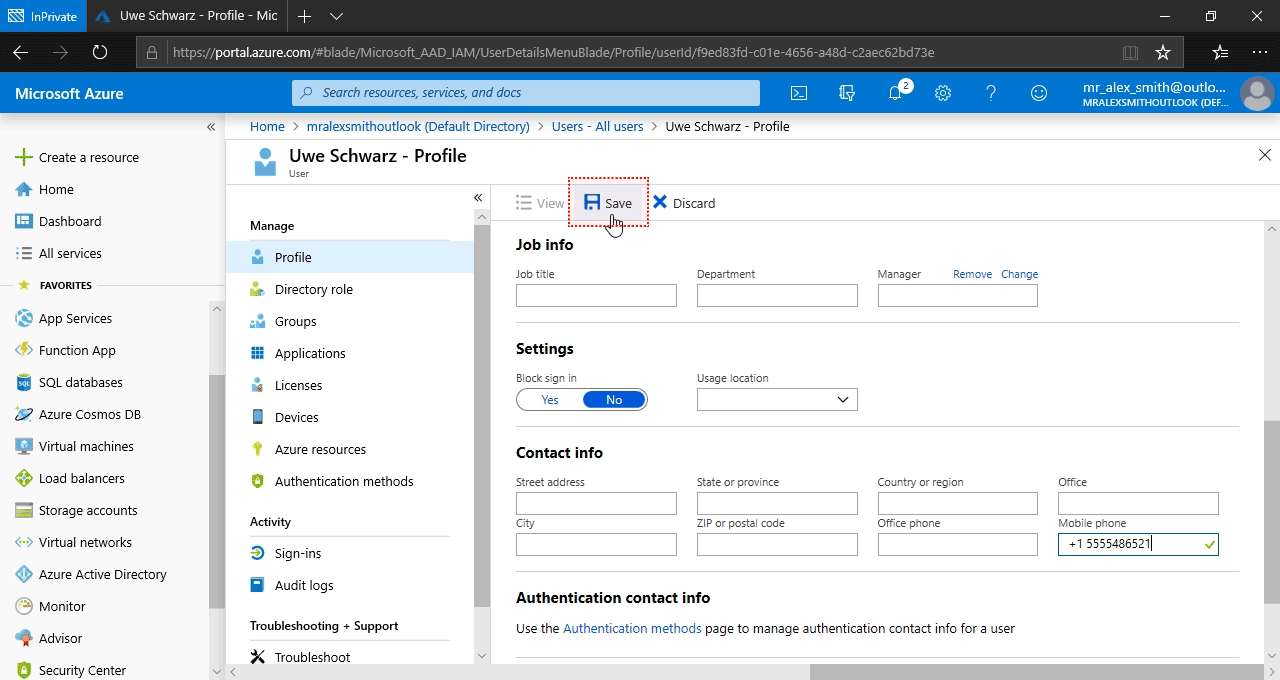
Set user's mobile phone number, then click on the Save button.
Please note: Azure's phone number input field requires a space after the country code
(e.g. +1[space]5555486521).
Repeat these steps to add more users.
Please note: it may take some time (usually less than 30 minutes) before added users can use StealthMail.
Now you can go back to the main guide.